Table of Contents
Chipwhisperer
~~META: status = active &relation firstimage = :project:chipwhisperer-project-logo.png ~~
Introduction
This project covers (differential) power analysis, timing attacks and glitch/fault attacks using Chipwhisperer Lite board.
We will look at SW version 4.0.x, since 3.5 is old and 5.0 is alpha.
Bugs
Note that IDE and examples are buggy. A lot. Some of the things can be found out if you know python scripting, some are much more difficult. See notes below.
One example that is tied to Plasma5 in Ubuntu 18.04 is that it sometimes needs no double-click for the script to execute. This was very confusing at the beginning, since you can only connect once with the connect script.
Links
Related stuff
Schematics and board layouts
Schematics and board layouts can be viewed under the chipwhisperer checked out directory, in various directories (victims, tools, etc). There are .sch, .brd and generated .pdf files for schematics.
Chipwhisperer password cracking based on timing/power analysis
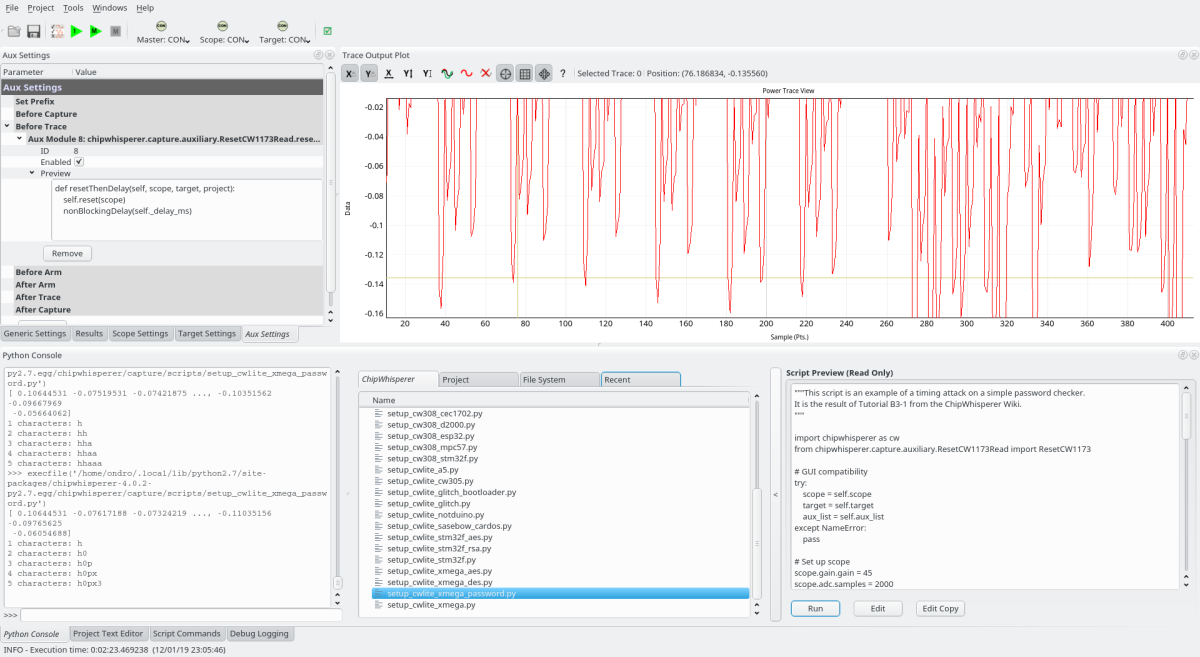
An example screenshot of guessing the password for XMEGA target program from power traces
Tutorial link: https://wiki.newae.com/Tutorial_B3-1_Timing_Analysis_with_Power_for_Password_Bypass
Note: there are bugs in the tutorial!!
- Do not put GO COMMAND (target.go_cmd) empty or without newline. It will cause endless loop of trigger because of timeouts, since the trigger in code wasn't reached. This will cause “Timeout in OpenADC capture” error. You need to reset the board, there are couple of buttons like “Reset DCMs”, “Reset ADC DCM”, “Reset CLKGEN DCM” and “Reset DCM” in “Scope Settings” tab. If everything fails, reset the board by unplugging it and restart the capture IDE.
- Depending on compiler, the timings in the attack scripts will be very different, and not necessarily multiple of a value, even though the part you are attacking is a for loop. A mathematical workaround like cross-corelation or a low-pass filter would work for this well, but are not covered in the tutorial
- Even then, you have to adjust the Y axis reading, might not work for the first time. The point is to adjust the Y axis value enough to check for wrong password, but not enough for the correct password letter. Takes time to fine out the value. Also settings in gain can influence this.
Chipwhisperer AES cracking
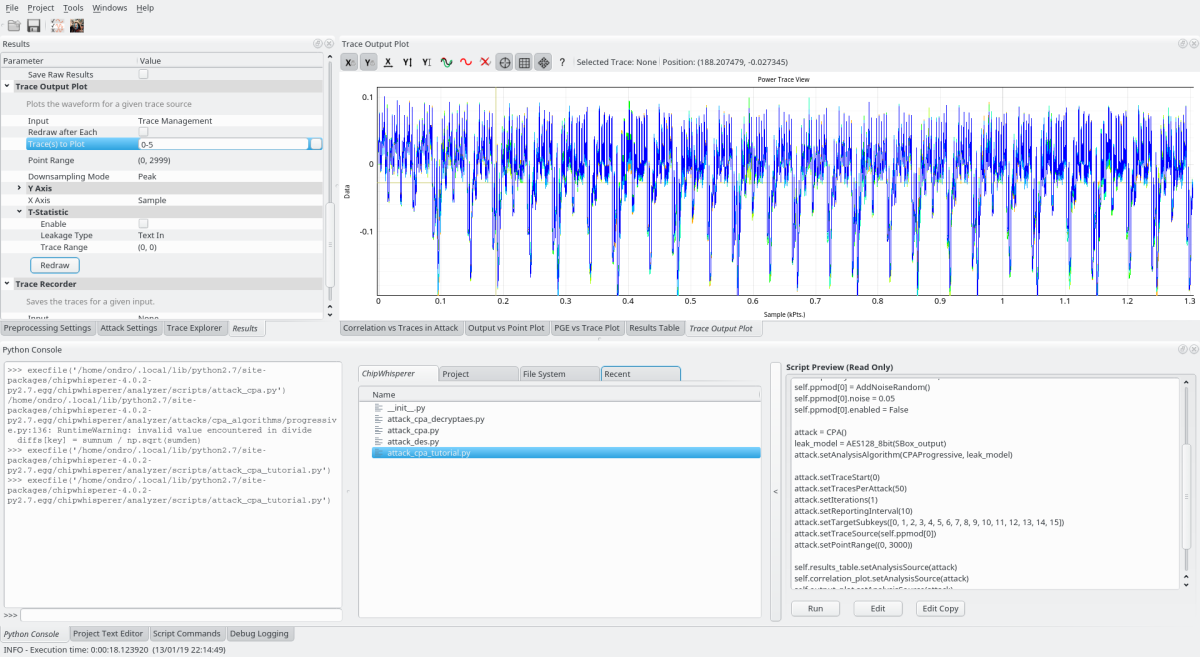
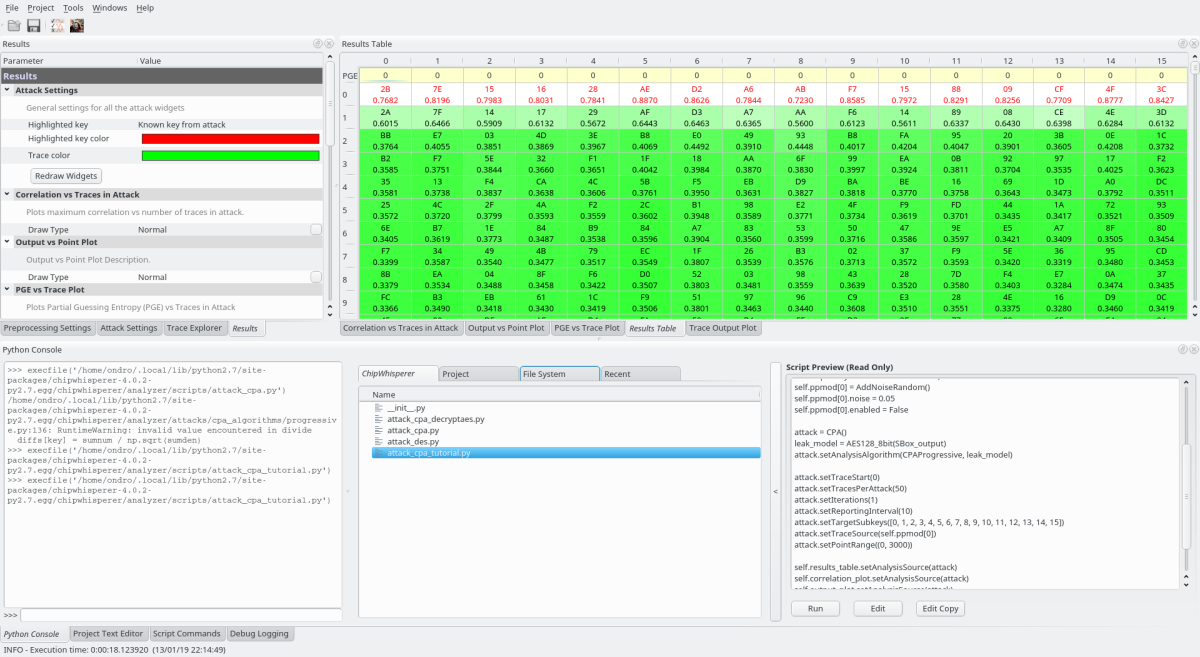
An example screenshot of trace analysis of AES enryption to get the right AES key (note: the AES version in Chipwhisperer has reduced round count due to export restrictions, but it does not matter for the procedure):
Tutorial link: https://wiki.newae.com/Tutorial_B5_Breaking_AES_(Straightforward)
Note: there are bugs in the tutorial!!
- there seems to be some source code issue or compiler issue. The precompiled file code from chipwhisperer-4.0.4/hardware/victims/firmware/simpleserial-aes/simpleserial-aes-CWLITEXMEGA.hex seems to work right, but when you use “make”, it won't generate response for some reason
- for the purpose of tutorial, use the precompiled file
- IMPORTANT: you need to save the project BEFORE capturing the samples and also AFTER capturing the samples, otherwise it will end up in some random default location. This is a known bug.
- TODO: some magic to find out what's wrong, since it affects all simpleserial protocol examples
Viewing where the AES cracking results came from
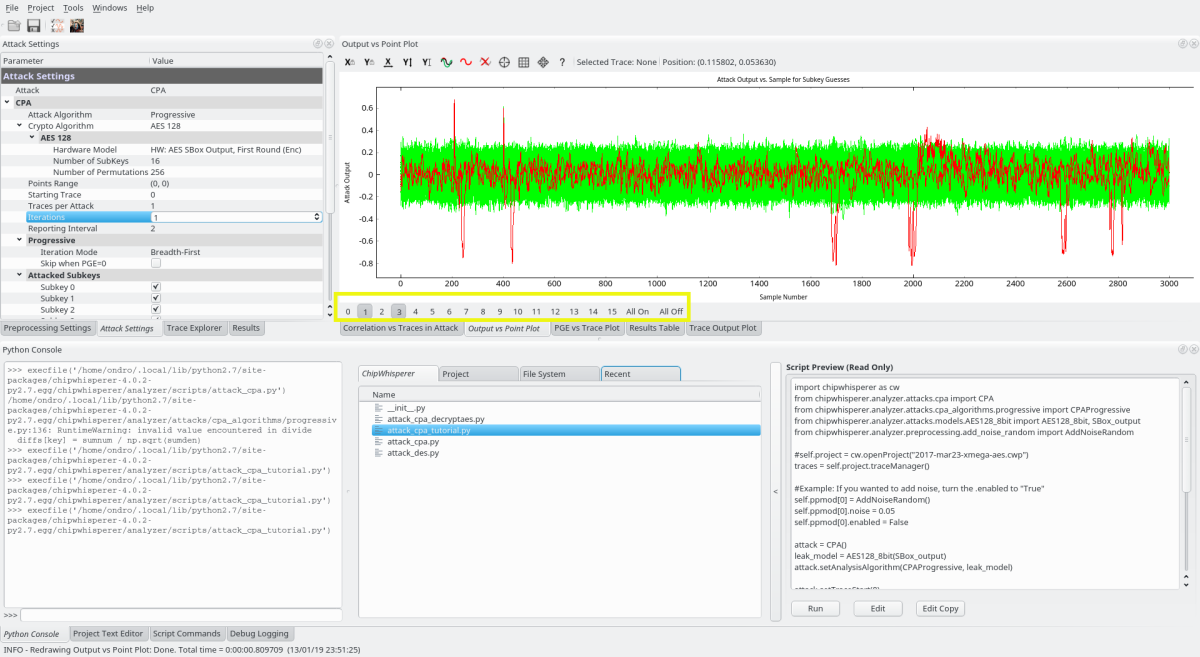
Looking at the place where results got from - click “Output vs Point Plot” and then select the bytes to show in the yellow rectangle:
Glitching STM32 external board through UFO-board interface
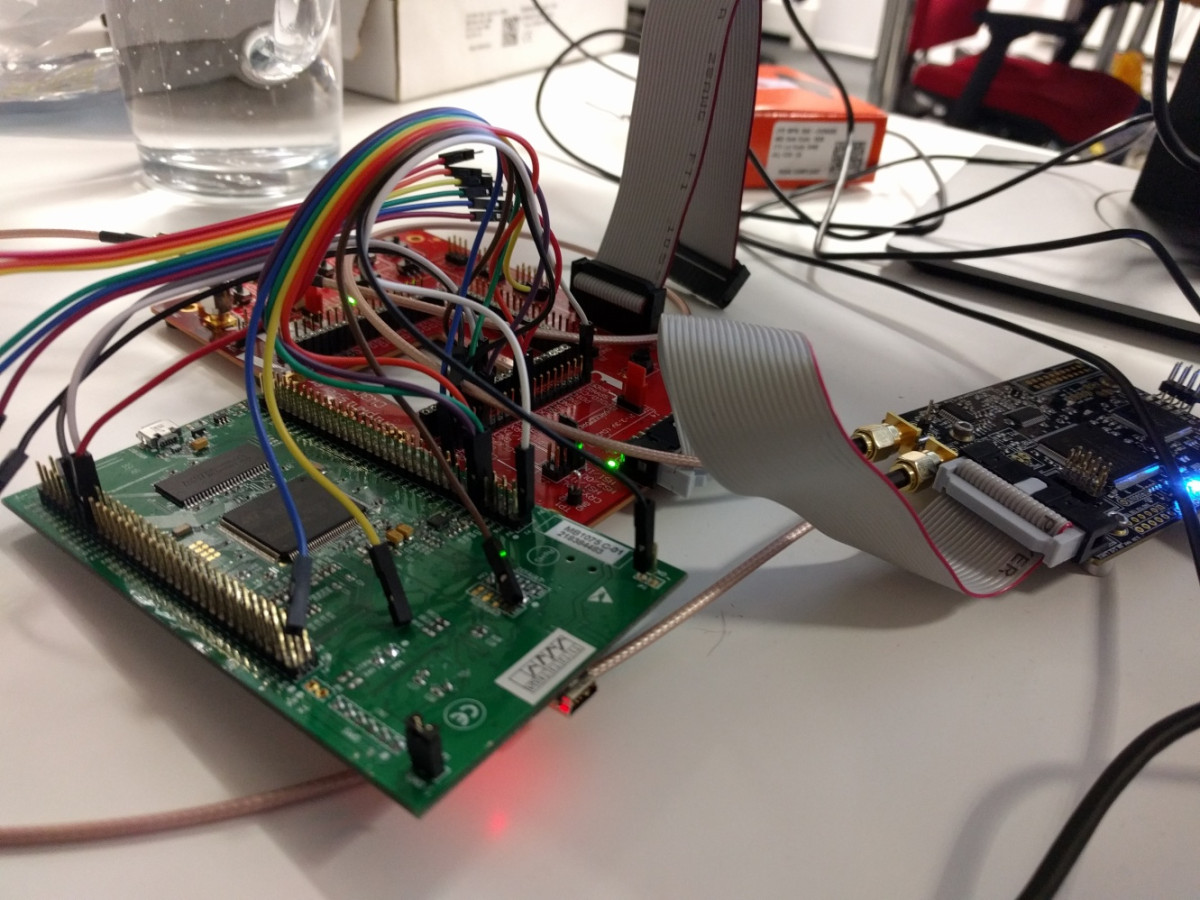
Glitching an STM32F429 discovery evaluation board. The board required resoldering of some solder bridges (SB18, SB19, removing X3 crystal oscillator) so that we can input glitch signal without interference from the STLink integrated SWD or any other clock signal, using PH0 as input from Chipwhisperer.
The chip has VBAT input, unfortunately it's not connected to any of the output pins, so powering the board from outside without using the STM32F0 SWD STLink is a bit challenge.
Unfortunately the board templates for STM32 for UFO boards are too small for this chip, which is not made in the smallest TQFP-64 package.
It'd might work better if SDRAM and display was desoldered as well. By comparing various STM32F4 (415, 427, 429) in STM32CubeMx it reveals that the clock circuits are very different.
FYI: just keep all the relevants part of pinout connected (GPIO4-trigger, RX/TX). Use 7.37 MHz clock instead of 8 MHz clock provided by the crystal oscillator or MCO from STLink so that the UART doesn't break. For anyone wondering why 7.37 MHz instead of 8 MHz, is that 7.3728e6/38400 == 192 and 7.3728e6/115200 == 64 precisely which is why 7.37 MHz is used for “industrial” UART clock generators. The chip will of course let you reconfigure the clock network, but for the usage with Chipwhisperer, using 7.37 Mhz is much easier.
STM32CubeMX
When you look at the clock networks of various STM32, you will find that each chip has different clock network, STM32F427 cannot be easily replaced with STM32F429.
UART bootROM protocol of STM32s via Chipwhisperer
Chipwhisperer has STM32 serial programmer which can do more stuff than just erase and flash new program (refer to AN 3155 and AN 2606 STM32 datasheet).
To get into the bootROM you need to trigger the right pattern (depends on specific STM32, but generally needs BOOT0 pin high with some extra conditions).
Once bootROM is running, you can issue commands like erase, write, protect/unprotect and others.
Some commands can be stacked, e.g. (extended) erase with write, some like (un)protect commands cause system reset of STM32 and you need to reopen the programmer.
An unfortunate side effect of pulling nRST (either from outside or from firmware) is that gdb connected to SWD as external target aborts.
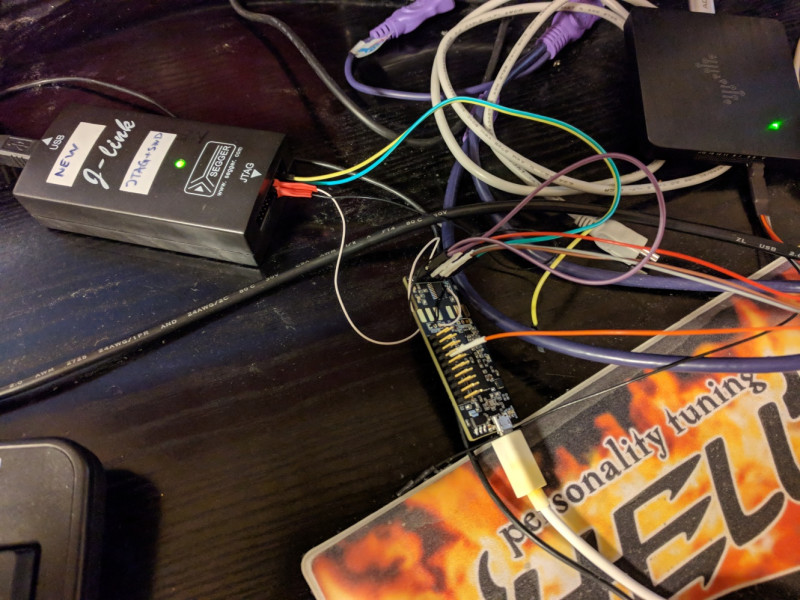
I would highly recommend using logic analyzer to check result since the STM32 programmer is PITA. Order of connection of SWD/JTAG and logic analyzer seems to matter. Once nRST is pulled, SWD/JTAG seems to lose ability to do proper system reset.
